


Great Depression Recipes Sure to Lift Your Spirits
March 19, 2021
When I first saw the recipe for Sprite Pie on TikTok, I was pretty disgusted. I mean, I definitely thought it was funny, but I thought there would be no way that it would’ve actually ended up working out as a real pie. To my surprise, when the pie was out of the oven and chilled, the video showed the transition to a pretty solid pie filling. Upon doing some more research, I learned that the recipe for Sprite Pie was actually based on one from the Great Depression Era known as Water Pie. I was intrigued when I learned that a pie with only five ingredients could turn out so well, and I learned that many other Great Depression Era recipes are like that, too.
Because a lot of ingredients, such as eggs and milk, were really hard to come by during the Great Depression, bakers found a way to continue making sweet treats for their families out of almost nothing.
It’s quite a fascinating thing to see, said William Walker, ‘22.
“I’ve made Depression cookies before. It was pretty cool,” he said.
Even though we’re not living through a recession on a scale like the Great Depression, we can still enjoy some of the clever recipes that cooks came up with in those circumstances.
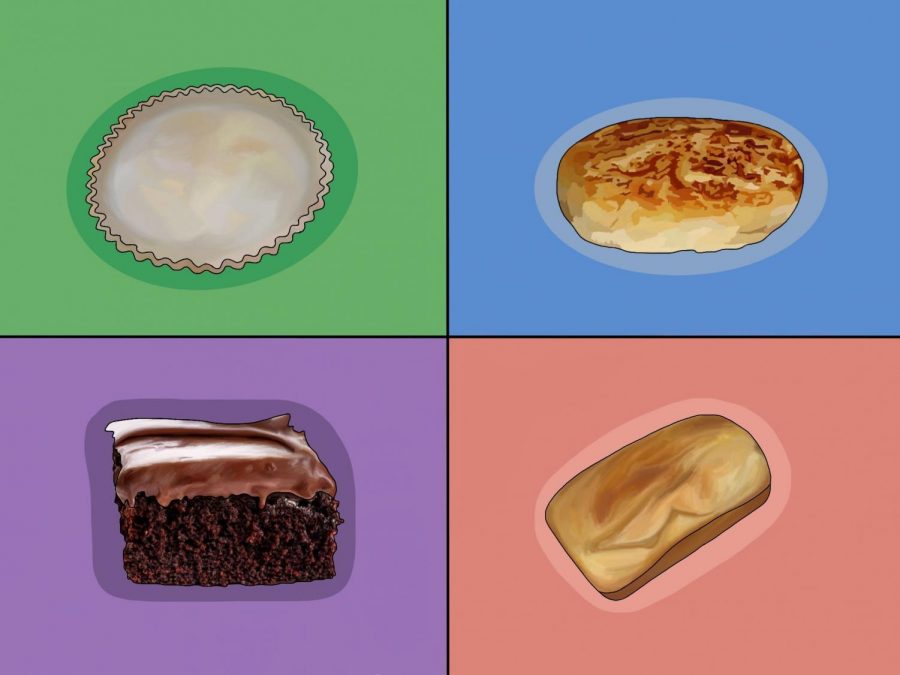
Wacky Cake
Source: I Am Baker
Description: Often called Chocolate Depression Cake or War Cake, this is a cake made without any milk, eggs, or butter, as these ingredients would be very hard to come by at the time. However, people during the Great Depression still came up with a great tasting cake that’s still popular today.
Thoughts: This cake was pretty good, and it tasted like a generic chocolate cake, so I think that’s a win. The frosting really takes the cake to another level, but the cake by itself is still delicious. I sent the recipe to my grandmother, who essentially has a vegan diet, and she really enjoyed the cake.
Would I Make This Again?: Probably. I would most likely just make it for my family if they come over, because most of them don’t eat egg. Honestly, the recipe kind of reminds me more of brownies than cake.
Ingredients:
Chocolate Cake:
1½ cup all purpose flour
1 cup sugar
¼ cup unsweetened cocoa powder
½ tsp salt
1 tsp baking soda
1 tsp vanilla extract
1 tsp white vinegar
⅓ cup vegetable oil
1 cup water
Frosting [See Recipe Note #1]:
3 Tbsp unsalted butter, softened
3 Tbsp unsweetened cocoa powder
1 Tbsp honey
1 tsp vanilla extract
1 cup confectioners’ sugar
3 Tbsp whole milk or heavy whipping cream
Extra Equipment:
8 x 8 in square pan
Method:
Preheat oven to 350 degrees.
In a large bowl, whisk together flour, sugar, cocoa powder, salt, and baking soda.
In a smaller, separate bowl, mix together the remaining ingredients before adding them to the dry ingredients, using a rubber spatula or a whisk to combine.
Pour into parchment-lined 8 x 8 inch pan [see Recipe Note #2] and bake for 30-35 minutes until an inserted toothpick is removed with a few crumbs. [see Recipe Note #3]
To make the frosting, use a hand-held mixer to combine butter, cocoa, honey, vanilla, and confectioner’s sugar.
Slowly add milk, one tablespoon at a time, until a frosting-like texture is achieved (Or whatever kind of texture you like frosting to be. It’s your cake – go wild).
Take your cake out of the pan and spread frosting over a cooled cake [see Recipe Note #4]
Recipe Notes:
Ok, so technically the frosting isn’t actually authentic or anything. It uses butter, heavy cream, and basically every single ingredient that would’ve been really expensive back in the 1930s. But since we’re not in the 1930s, you can choose to make this to put on top of your cake and make it extra special, but you’ll also be fine without it.
You can choose to grease the pan as well, but make sure you grease it really well, otherwise the cake will stick to the edges of the pan, and it will be a pain to cut and remove slices of the cake.
If you insert a toothpick into the cake and it comes out liquidy, DO NOT assume that it will take a really long time before it’s fully cooked, because you’ll probably forget about it and then it’ll be overbaked. BUT DO NOT WORRY if this happens, because, honestly, I did it, too, and it ended up being fine.
Something bakers should probably know about me is that I’m really impatient. Most of my baking flops are because I was being super impatient. If that’s the case for readers, take a walk for an hour or do some other activity before frosting your cake. Because this is a buttercream frosting, it will melt if students frost a cake that isn’t cooled. And it’s really gross.
Skillet Bread
Source: Deep South Dish
Description: This bread has been around since pre-Colonial times, but it was a staple in the Great Depression. Back then, this recipe was not much more than just flour, fat, and milk (or even water, if there wasn’t money for milk), but this recipe is more indulgent with buttermilk and extra butter on top.
Thoughts: This bread was really good. It’s honestly a lot better than I thought it would be, and it didn’t take that much time to make either. It’s also really filling, so I don’t recommend eating this as a side dish or anything.
Would I Make This Again?: Definitely. I think it was a really cool recipe, and I would make it as a quick dinner or something.
Ingredients:
2 tsp bacon drippings [see Recipe Note #1]
2 cups self-rising flour [see Recipe Note #2]
¼ cup very cold butter, cubed
¾ – 1 cup cold buttermilk
2 Tbsp of melted butter (optional, but it tastes really good)
Extra Equipment:
8 inch cast iron skillet
Method:
Melt the bacon drippings in a skillet on high heat
Add the cubed butter to the self-rising flour. Cut the butter into the flour. To do this, you’ll use either a pastry cutter or a fork to mash the butter into the flour until it gets really crumbly, and the butter is in really small chunks.
Add in the buttermilk, starting with ¾ cup and slowly adding more until it’s a shaggy dough that doesn’t come apart easily. (This is really important for later, because you are making a really big disk of bread, and it could break while you’re transferring your dough to the skillet or flipping it while it’s cooking.)
Transfer dough onto a floured surface and shape into a flat disk that’s slightly smaller than the size of your skillet
Use a wide spatula to transfer the dough to the hot skillet. Cover and reduce the heat to medium low. Flip the bread over when it’s golden-brown on the bottom and pour the melted butter on top of the bread, if desired. Then cover the skillet again and cook until the other side is brown.
Break off pieces and serve with soup, butter, honey or any spread you desire. You can also eat it plain if you like.
Recipe Notes:
If bakers want to make this more vegetarian-friendly, I made this recipe with butter, and I think it came out well.
If bakers are like me and don’t have self rising flour at home, they can use a substitute from All-Recipes. To make two cups of self-rising flour at home, combine 2 cups of all-purpose flour, ½ tsp of salt, and 3 tsp of baking powder.
Peanut Butter Bread
Source: Deep South Dish
Description: This recipe comes from a depression-era cookbook called the Five Roses Flour: A Guide to Good Cooking. This great-tasting bread is super easy and quick to assemble.
Thoughts: It literally just tastes like peanut butter if it were bread. I wish I had more to say about this, but the best way to describe it is just that. Don’t make this if you’re expecting something sweet (although you can probably add sweetness with other ingredients, like chocolate chips). All that said, it’s really easy to make; it probably took 10 total minutes to toss the ingredients together.
Would I Make This Again?: Probably not, considering I don’t like peanut butter that much. Honestly, it wasn’t that bad though. My parents just treated it like regular bread, toasting it and spreading butter on it for breakfast.
Ingredients:
2 cups all-purpose flour
¼ cup sugar
4 tsp baking powder
½ salt
1⅓ cup milk
½ cup peanut butter [see Recipe Note #1]
Extra Equipment:
Loaf tin
Method:
Preheat oven 325 degrees
Whisk together the all-purpose flour, sugar, baking powder and salt.
Slowly mix in the milk, then add in the peanut butter. It would be helpful to use a rubber spatula to bring it all together.
Scrape dough into a heavily greased loaf tin [see Recipe Note #2] and bake for an hour.
Recipe Notes:
If bakers don’t have peanut butter, just roast some peanuts, remove their skins, and blend until at a peanut butter consistency. Add a pinch of salt.
I did this part on my own, but I would recommend having someone hold the bowl of dough while bakers scrape it into the loaf tin.
Water Pie
Source: Southern Plate
Description: This article wouldn’t be complete without this recipe that was popularized through the viral Sprite Pie on TikTok. The Water Pie recipe was developed as a way to make an ingenious sweet treat during hard times. Of course, now the main appeal is to make a nice tasting pie with a special and surprising ingredient.
Thoughts: It wasn’t that bad. The taste was a little reminiscent of sweet rice flour, but it was so much better than I thought it would be considering that it’s made of, y’know, water. It was really cool seeing it go from this weird watery goop to something that you could actually cut and eat.
Would I Make This Again?: Yes, for the shock value. No, for serious baking endeavors.
Ingredients:
1 9-inch deep dish pie crust, unbaked [see Recipe Note #1]
1.5 cups water
4 Tbsp all-purpose flour
1 cup sugar
2 tsp vanilla extract
5 Tbsp butter, grated [see Recipe Note #2]
Method:
Preheat oven to 400 degrees.
Set empty pie crust on a baking sheet and pour water into the pie crust.
In a small bowl, stir together flour and sugar. Sprinkle mixture over water in crust, using either a spoon or your fingers. DO NOT STIR.
Drizzle vanilla over the water in pie crust (again, DO NOT STIR). Spread butter evenly over the pi.
Take aluminum foil and cover the top of the pie. Carefully cut an X into the foil and peel back the triangles, making sure that the foil covers the crust but most of the pie filling is exposed.
Bake pie at 400 degrees for 30 minutes, then reduce the heat to 375 and cook for an additional 30 minutes.
CAREFULLY pull pie out of the oven. It will be watery, but as it cools it will set. Allow the pie to cool completely, then cover and place in the fridge to chill before cutting.
Recipe Notes:
The original recipe specifically cites a Pillsbury all-vegetable frozen deep dish pie crust, but I used a generic type. The author specifically cautions against making your own pie crust, because of variances in depth that will cause the filling not to set. Bakers can make their own crust if they want, just be prepared for the consequences.
- Bakers can also just cut the butter into large pats (about five pieces) and evenly spread them around the pie, but I think that grating the butter is a better approach.